


NETVIGATOR
Setup an internet connection - Windows XP
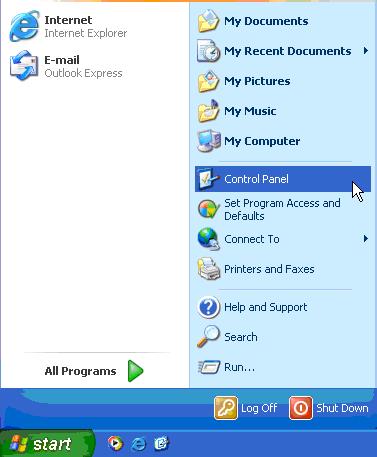
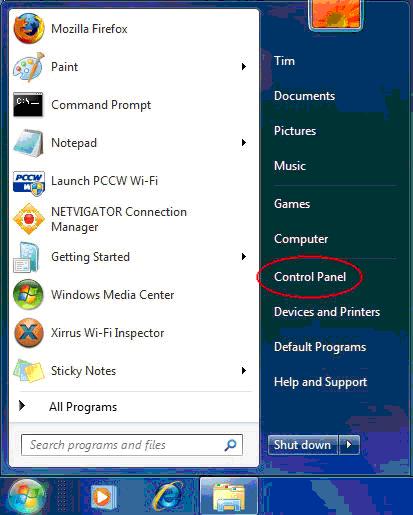
1. Please click the "Start" menu ![]() , and then click the "Control Panel" item to open the Control Panel.
, and then click the "Control Panel" item to open the Control Panel.
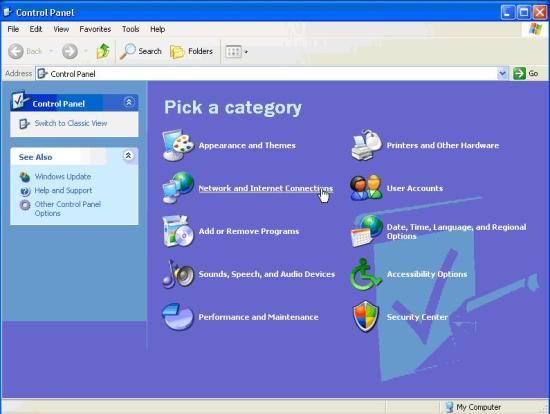
2. In the Control Panel, please click the "Network and Internet Connections" item to continue.
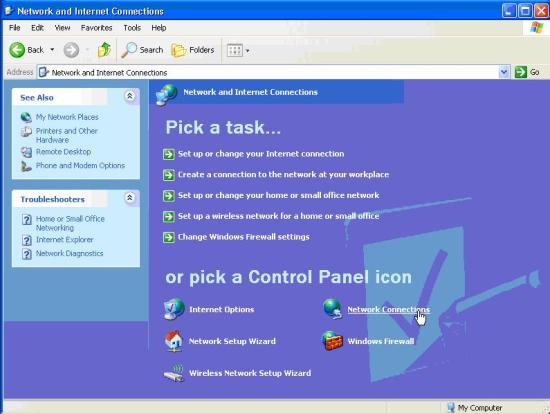
3. In the "Network and Internet Connections" window, please click the "Network Connections" item to continue.
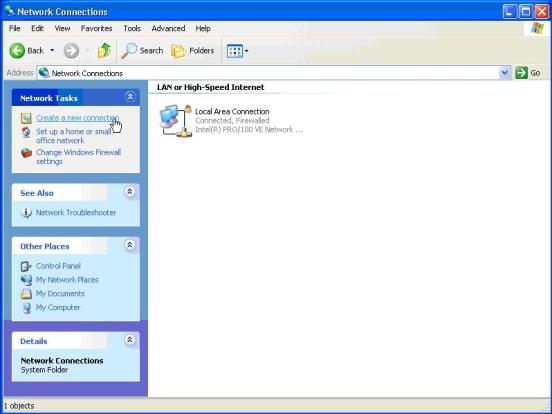
4. Please click the "Create a new connection" item from the "Network Tasks" window to continue.
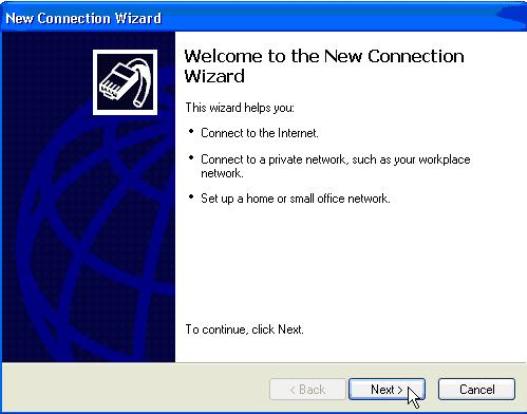
5. At the "New Connection Wizard" window, click the "Next >" button to continue.
6. Select the "Connect to the Internet" option, and then click the "Next >" button to continue. 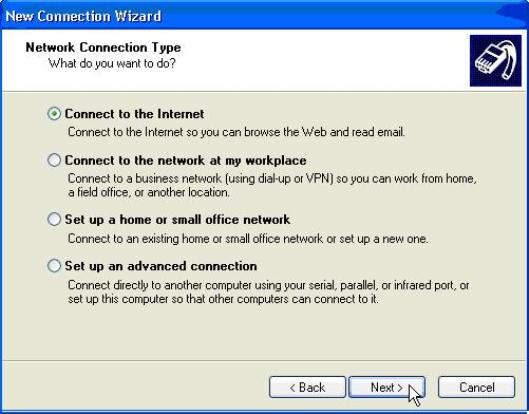
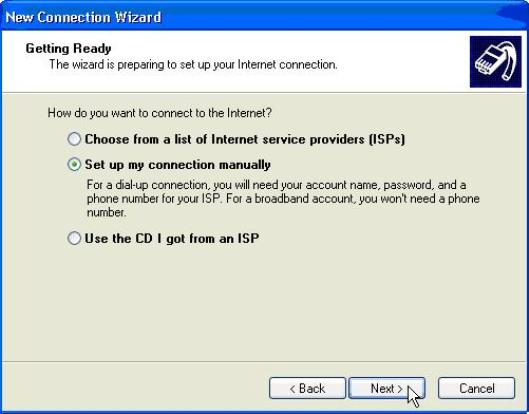
7. Select the "Set up my connection manually" option, and then click the "Next >" button to continue.
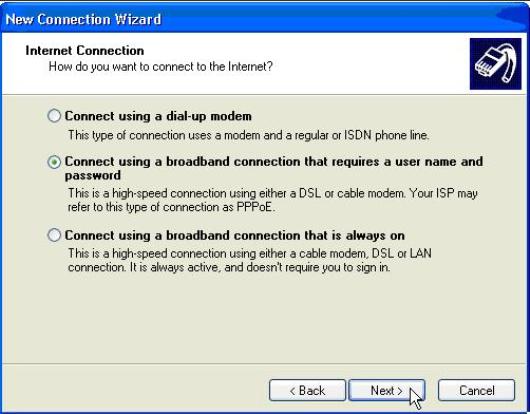
8. Select the "Connect using a broadband connection that requires a user name and password" option, and then click the "Next >" button to continue.
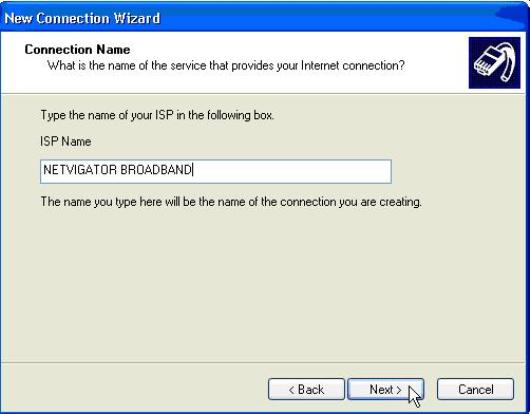
9. Type "NETVIGATOR BROADBAND" into the field of "ISP Name", and then click the "Next >" button to continue.
10. Please enter your username (i.e. "loginID@netvigator.com"), password and confirm password, and then click the "Next >" button to continue.

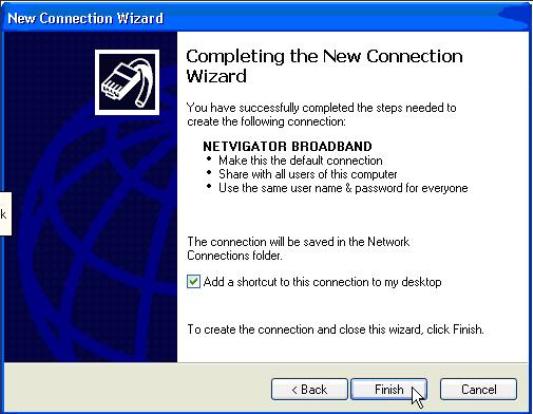
11. Click to enable the "Add a shoutcut to this connection to my desktop" option, and then click the "Finish" button to complete the setup.
Connecting to Internet (PPPoE Dialer Setup Completed)
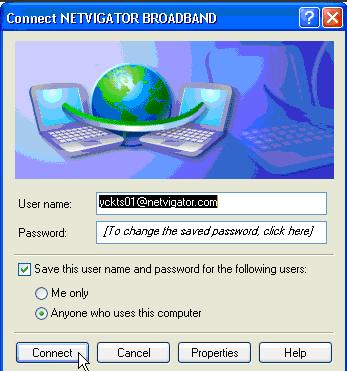
1. A "NETVIGATOR BROADBAND" shortcut  is created on Windows desktop. Double click the shortcut.
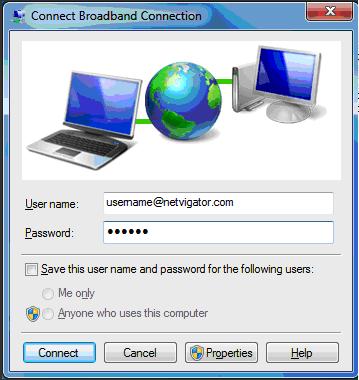
2. A "Connect NETVIGATOR BROADBAND" window appears, click the "Connect" button to connect.
3. After connected, the following icon ![]() appears at the task bar (bottom right hand side of Windows desktop).
appears at the task bar (bottom right hand side of Windows desktop).
Setup an internet connection - Windows Vista
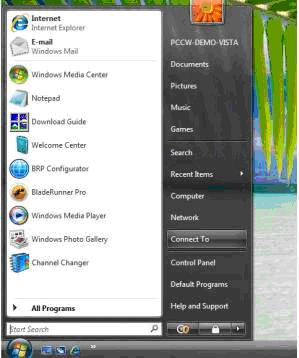
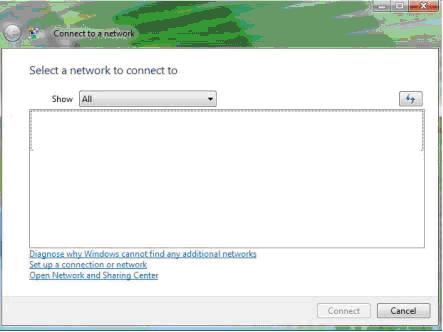
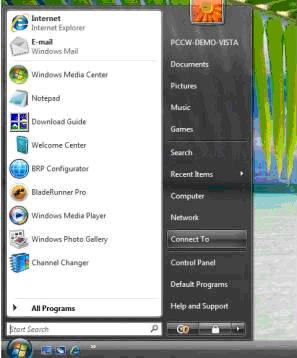
1. Click on the Windows icon ![]() and select “Connect To”
and select “Connect To”
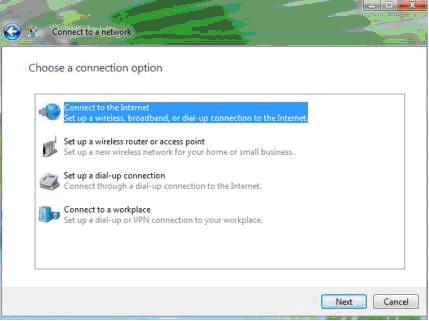
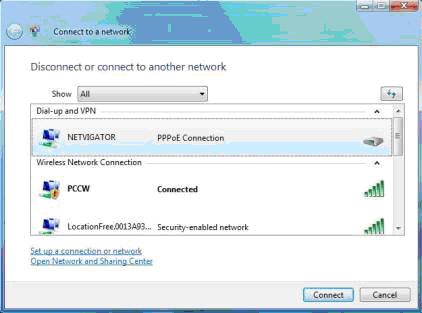
2. Click on “Set up a connection or network”
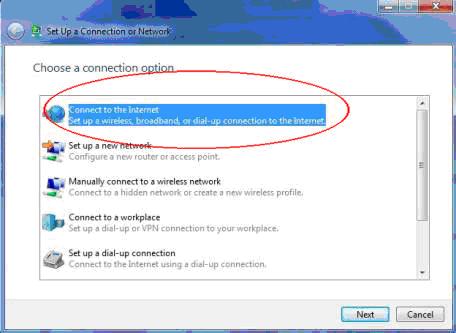
3. Choose “Connect to the Internet” option
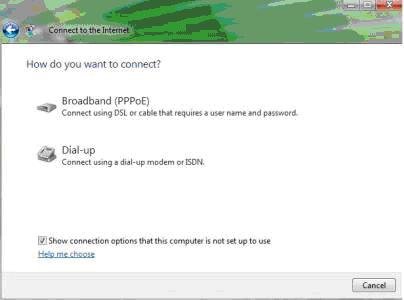
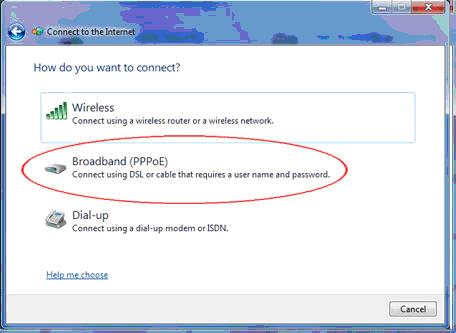
4. Select connection using “Broadband (PPPoE)”
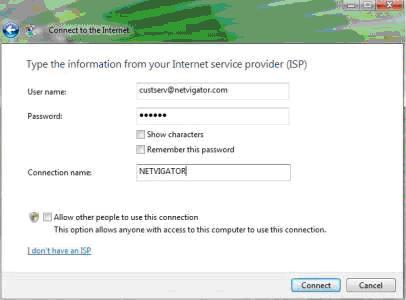
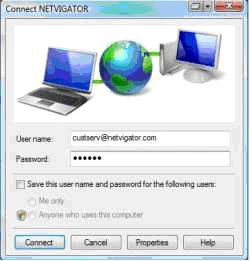
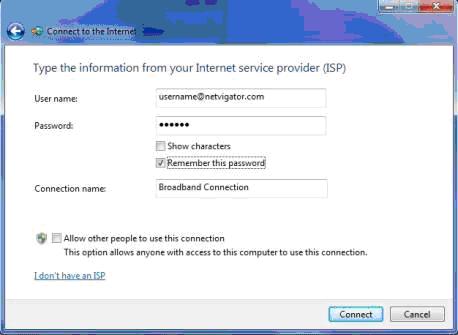
5. Type in your “User name” and “Password” and click “Connect”
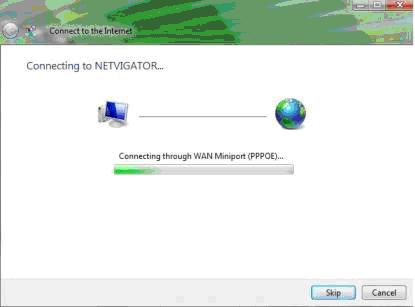
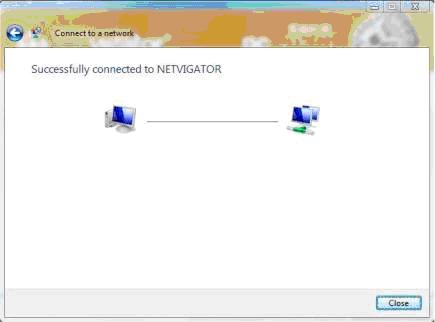
6. The computer is now connecting to the Internet
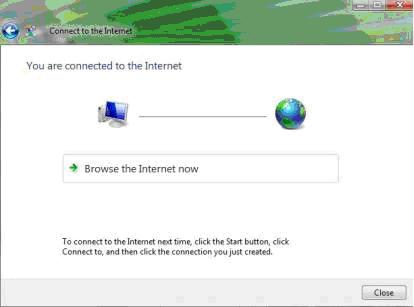
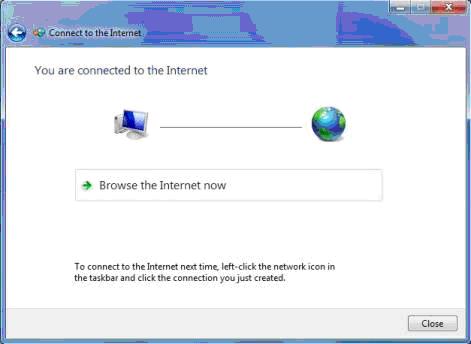
7. The computer is now connected to the Internet. Simply click “Browse the Internet now” to launch the browser.
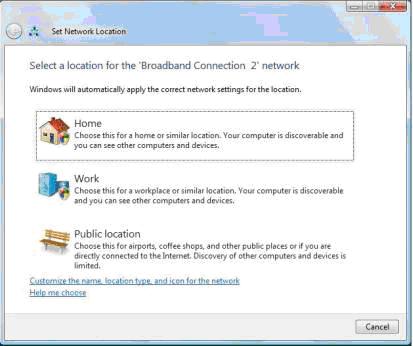
8. Select “Home” option to complete the setup procedure.
9. The setup is now completed. Click “Close” to close the setup windows.

Connecting to Internet (PPPoE Dialer Setup Completed)
1. Click on the Windows icon ![]() and select “Connect To”
and select “Connect To”
2. Select “NETVIGATOR PPPoE Connection” and click “Connect”
3. Enter your password in the password field
4. The setup is now completed. Click “Close” to close the setup windows.
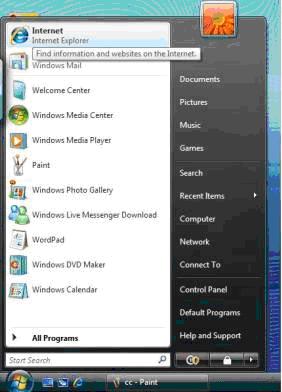
5. Click on the Windows icon ![]() and select “Internet Explorer” to launch the browser.
and select “Internet Explorer” to launch the browser.
Setup an internet connection - Windows 7
1. Click on the Windows icon and select “Control Panel”
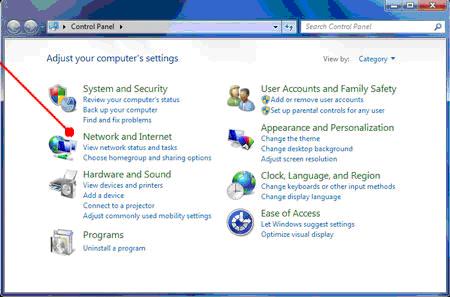
2. Click “Network and Internet”
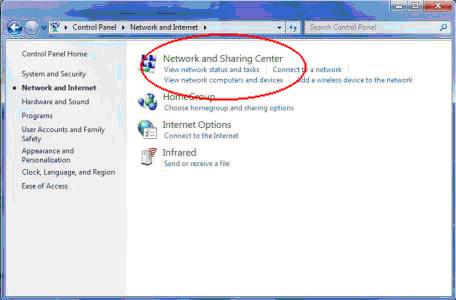
3. Choose “Network and Sharing Center” option
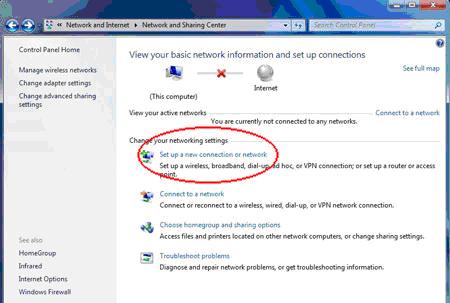
4. Click “Set up a new connection or network”
5. Choose “Connect to the Internet” and then click “Next”
6. Click “Broadband (PPPoE)”
7. Type in your “User name” and “Password” and click “Connect”
8. The computer is now connected to the Internet. Simply click “Browse the Internet now” to launch the browser.
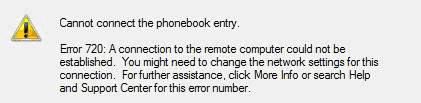
Windows XP Error 720
A connection to the remote computer could not be established.

Solution
1. Click “Control Panel” and choose “Network Connection”;
2. Right click “Local area connection”and click “Properties”;
3. Under the“General”tab of “Local area connection”, Â check the box of “Internet protocol (TCP/IP)”and then click “Properties”;
4. Under the “General” tab of “Internet protocol (TCP/IP)”, choose "Obtain an IP Address automatically" and "Obtain DNS Server Addresses";
5. Click “OK”.
Windows Vista Error 720
A connection to remote computer could not be established.
Solution
1. Click “Control Panel”, choose “Network and Sharing Center” and click “manage connection manager”;
2. Right click “Local area connection”and click “Properties”;
3. Under the “General” tab of “Local area connection”, check the box of “Internet protocol Version 4 (TCP/IPv4)”and then click “properties”;
4. Under the “General” tab of “Internet protocol Version 4 (TCP/IPv4)”, choose "Obtain an IP Address automatically" and "Obtain DNS Server Addresses";
5. Click “OK”.
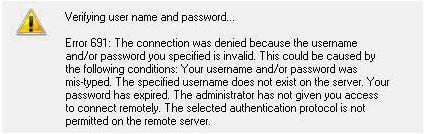
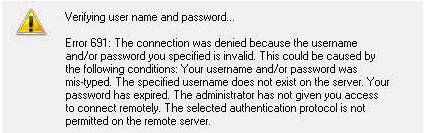
Windows XP Error 691
The connection was denied because the username and/or password you specified is invalid.

Solution
- Make sure NETVIGATOR account has not been suspended due to overdue payment.
- Make sure the user name (Login ID) followed by @ netvigator.com / @ hkstar.com and password is case sensitive.

- Make sure there is no concurrent login of broadband connection.
- Re-establish a new connection.
Windows Vista Error 691
The connection was denied because the username and/or password you specified is invalid.
Solution
- Make sure NETVIGATOR account has Not been suspended due to overdue payment.
- Make sure the user name (Login ID) followed by @ netvigator.com / @ hkstar.com and password is cases sensitive.
- Make sure there is no concurrent login of broadband connection.
- Re-establish a new connection.
Windows 7 Error 691
The connection was denied because the username and/or password you specified is invalid.
Solution
- Make sure NETVIGATOR account has Not been suspended due to overdue payment.
- Make sure the user name (Login ID) followed by @ netvigator.com / @ hkstar.com and password is cases sensitive.

- Make sure there is no concurrent login of broadband connection.
- Re-establish a new connection.
Windows XP Error 678
The remote computer did not respond.
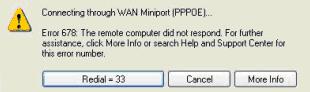
Solution
- Make sure the modem’s cable has directly connected to the computer.
- Restart the modem (turn off the modem power for 15 seconds) and ensure that all cables have been connected.
- Check the status of the network adapter to ensure it is enabled. If it is enabled, you will see “Enabled” under “Local Area Connection” as show in the picture below.

- Re-establish a new connection
Windows Vista Error 815
The remote server is not responding.
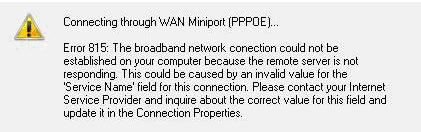
Solution
- Make sure the modem’s cable has directly connected to the computer.
- Restart the modem (turn off the modem power for 15 seconds) and ensure that all cables have been connected.
- Check the status of the network adapter to ensure it is enabled. If it is enabled, you will see “Enabled” under “Local Area Connection” as shown in the picture below.

- Re-establish a new connection

